Pages

Followers

Saturday 10 September 2011

There's Still Time!

Happy Saturday all! 
Don't forget there's still time to play in the Dude Time Doodles Sketch challenge this week!
Here's a reminder of the sketch!

It's nice & simple & I had a lot of fun!
Check out my card here!
Enjoy the rest of your day!

Friday 9 September 2011

It's Another Baby Card!

Hi folks,
I have another card to share with you today!

It's a new baby card made using the 
Rocking Horse image from The Crafty Pad Designs!

This one was a commission for a friend at work who wanted green & pink!


Her friend's baby was due any day & she had no idea of the sex
 but wanted a card ready to give straight away!


It's such a sweet little image!
I coloured it up with promarkers & nipped the corners with a little corner punch.
I then matted it onto some pink & green card.
The layout was a sketch from my sketch file!


I'm sure the DP was a freebie from somewhere but it has been 
printed out in my stash forever & I can't think for the life of me where it's from!
I matted that onto the pink card too!
I punched out some pink & green butterflies with my Martha Stewart punch, layered them 
& added a sticky back pearl to each!


I also added some little buttons to finish it off.
Thanks for looking!
Don't forget there is a sale on at The Crafty Pad Designs this week,


All images are 40% off.
Make sure you get over & fill your basket before Wednesday when the sale ends!
I'd like to enter this card in the following challenges
C.R.A.F.T. Children
Pixie Dust Studio Baby card for a boy or girl
My Mum's Craft Shop Lots of Layers
Creative Card Crew Anything Goes
Stamp N Doodle Anything Goes
Crafty Boots Anything Goes
Make It Monday Anything Goes
Pile It On B Is For..... (Buttons & Butterflies on my Baby Card!)
Stampin' Sisters In Christ Nothing Bright Pastel Colours on my card)
Your Next Stamp Challenge Inspired by a Song (Rock A Bye Baby)

Wednesday 7 September 2011

Spring Card Tutorial

My first ever tutorial!

 
I’ve been asked a number of times for the template to make this type of card, so I decided to do a little tutorial to show you how I make them.
There are lots of templates out there but this is simple to do.
I was shown some time ago at a demo by Nikki, how to make a spring card from a square card blank.
I will use this as the basis for this tutorial.
My apologies if it’s a bit long
winded!

Equipment used
Score Board & scoring tool.
(Not a necessity, you can use a ruler
& an embossing tool or similar)
Paper Trimmer or
Sharp Scissors


Additional Equipment/Materials Used
A4 Sheet of patterned paper (try to use one which the pattern can be used in any direction)
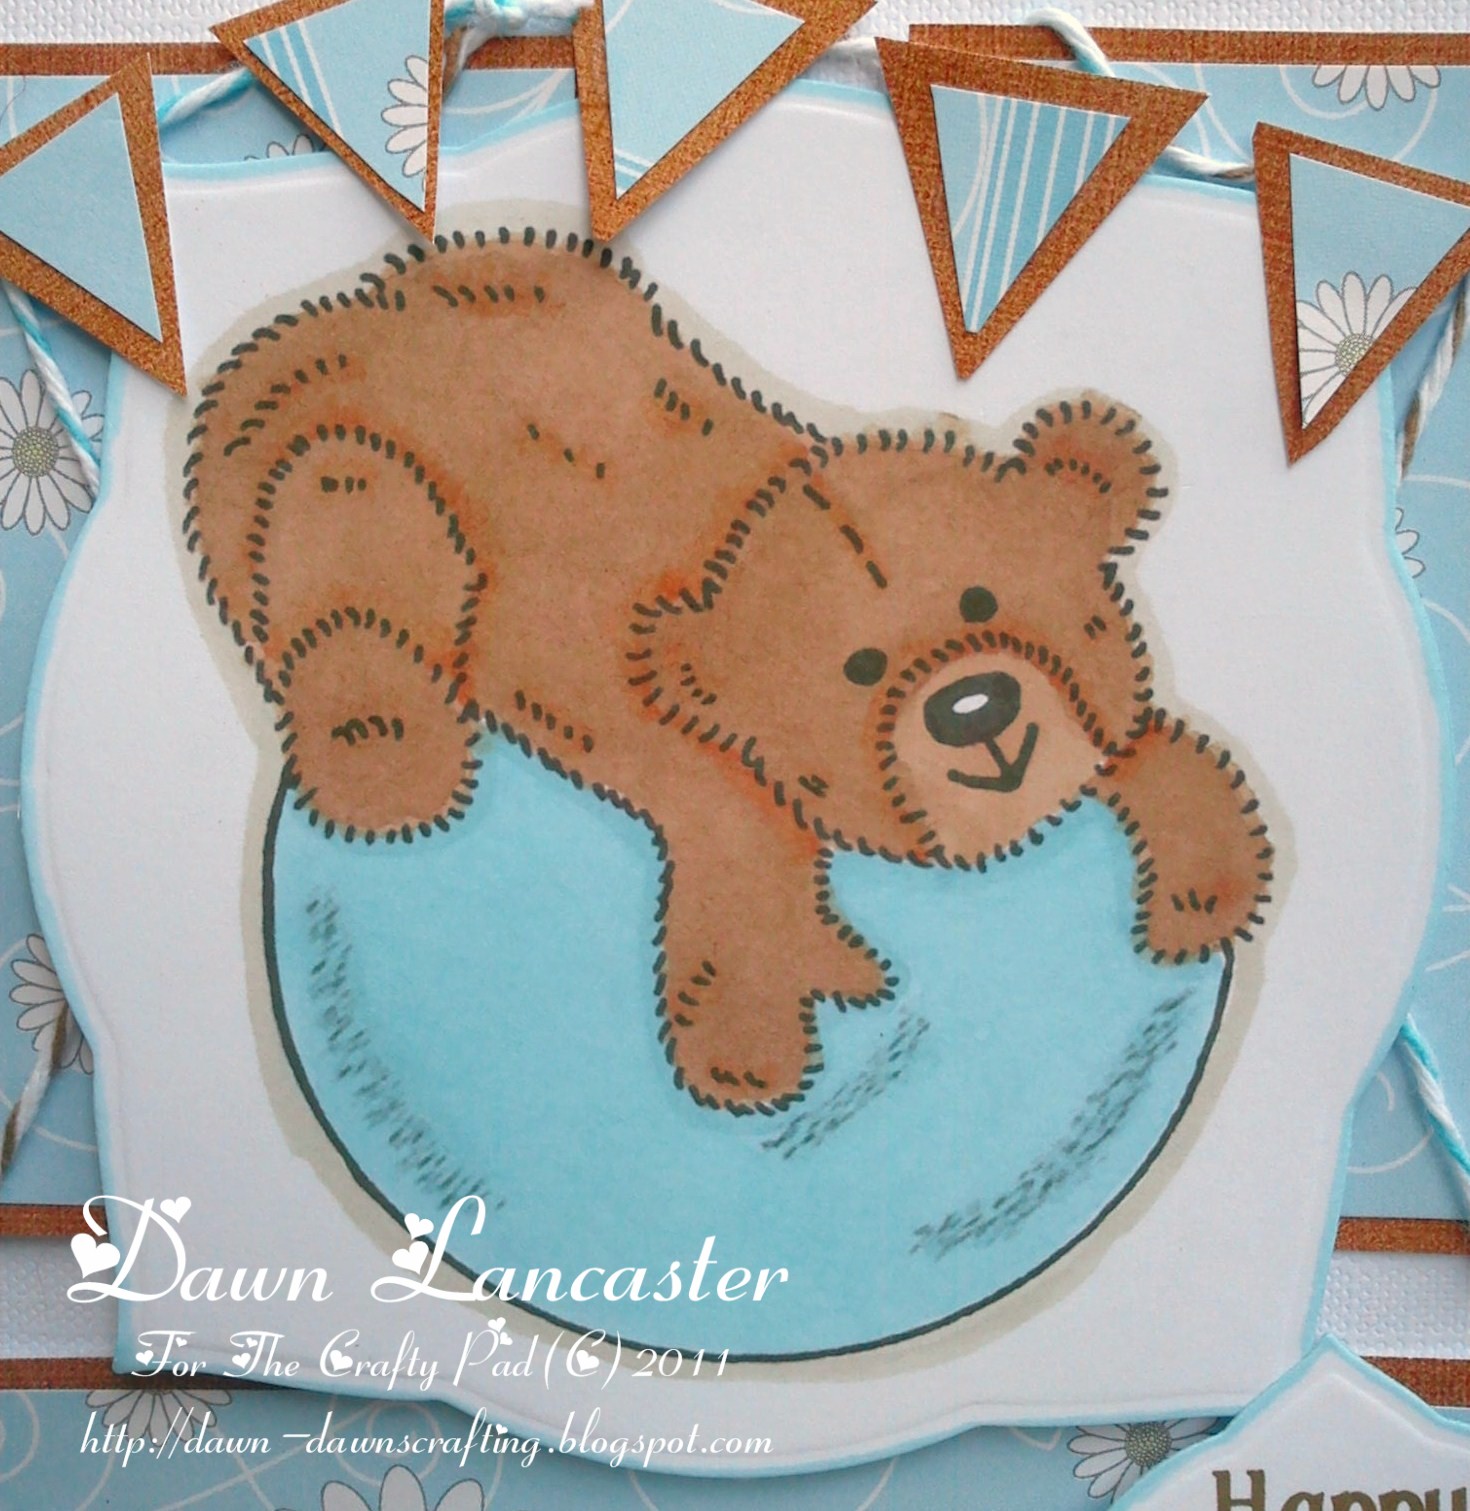
Image, Baby Boy From The Crafty Pad Designs
Sentiment It’s a boy also from The Crafty Pad Designs
Adhesive (DST, Tape runner, or Photo Glue)
Embellishments


Other Items used include Promarkers for colouring Nestabilities 
& Big Shot to cut & emboss image & sentiment.


Step 1
Using your score board & scoring tool, score your sheet of card
at half A4 size (148mm if you have to measure).              
Then fold & crease using a bone tool or similar to give a crisp fold.
(I find I normally have to trim a tiny bit of excess off)


Step 2
Place your card back on your scoreboard  (landscape) & score again at half A4 size (148mm) to create a square card blank. Trim off the excess with a paper trimmer or sharp scissors & put aside for later.

You can use any size square you want to but the measurements will be different.


Step 3
Mark at the mid point on all 4 sides
of  the square.
You can use pencil if it makes it easier to see.
Then erase the marks later.


Step 4
Open up the card, score  at A4 gate fold  (74mm) on the other half & fold, creasing to give a crisp edge. This will be the base for your card to sit on. Open this fold out again for now.


Step 5
If you are using a scoreboard line up the  midpoint marks & score from the top mid point to the side midpoint on either side.
(If not use your ruler & embossing tool)
You can trim away the excess if you want to at this point or just leave it & fold it back later.
I personally like to cut it off.


Step 6
Score from the mid point on either side down through the middle of your card to meet up with the edge of the gate fold.         
Fold over & crease these folds then open out again.


That’s all the scoring & folding done! Now it’s time to decorate your card!
I find it’s much easier to add all or at least most of the decoration before the final folding & assembly!
For simplicity I have used just one layer of paper this time but I like the effect 
of two layers also! All you have to do is reduce the measurements for the second layer.

Step 7
Cut a section of your pattern paper to fit  the gatefold section of your card approx 140mx68mm should be a good fit.                            


To cover the triangle mid-sections, I cut two 68mm square pieces of the patterned paper, then cut them in half diagonally to give the four triangles.


Step 8
The top diamond section is covered with a 98mm square piece of paper. I like to use photoglue for this part as you can slide things around a bit to get them in the right place. I added some ribbon around the sides of the diamond.                                                      I also added a strip of ribbon across the gatefold section.
I used a piece of the left over card to cover the ends of the ribbon.


Step 9
I stuck my image onto the top section .


I then used a glue runner on the blank triangle section.


Step 10
This is then stuck down onto the gatefold section et voila,
a spring card!

Because it is difficult to add a hand written greeting onto the card once it is assembled, I like to make a little tag from the scrap card & paper.
I added the sentiment to this & because my ribbon isn’t double sided, I punched two holes, threaded the ribbon through & glued it at the back.
The tag can then just tuck in to the back of the card.

This card should fit neatly into a 150mm x150mm square envelope.
If you want to use a square card blank keep the envelope supplied with it as the spring card should still fit neatly inside it!
I hope you found this tutorial easy to follow & don’t forget to let me know if you make a card using it as I will come over to admire your work!
( I changed the line colour of the circle sentiment to match my card)
There is a great tutorial by Leesa here, showing you just how to do this.

Did you know that there is a sale on over at The Crafty Pad Designs?

All images are on 40% off sale!
(this excludes single sentiments)
The sale runs for 1 week from
Wed 7th September 2011- Wed 14th September 2011
Make sure you pop on over & stock up on all those fabby images before time runs out!

I'd like to enter my card in the following challenges
Crafty Creations Anything But a square
Freshly Brewed Something new
Simon Says Stamp Multi Fold Cards
Creative Card Crew Anything Goes
Ladybug Crafts Ink TLT Anything Goes
Papertake Weekly Anything Goes, Option, use a shaped card
Ribbon Carousel Challenge Anything Goes
Crafty Boots Anything Goes
Daisy Doodles Creative Challenge Anything Goes
Make It Monday Anything Goes
Paper Pretties Primary Colours (Blue & Yellow)
Vitorine Originals Primary Colours
One Stitch At A Time Use a Digi
Stampin' Sisters in Christ Use Quiet Colours
Catch The Bug Anything Goes
My Sheri Crafts Baby Boy Card
Delicious Doodles New & Fresh

Miner Ailment & A Sketch

Grab a cuppa chums, this is a long post!!!
It's Wednesday already & it's time for a new Sketch Challenge over at 
Woo Hoo! Feels like a very long time!!!!
Here's my card!


Here's the sketch
(sorry it's a bit blurry)


I made an easel "Get Well" card!
 I used the Sketch for the layout of the main easel section of the card.
You may have to study it a little to see the sketch!
I used some yellow cardstock for the base card.
The DP's I have used are called Charcoal Prints, 
by Sandra Ranarison for Dovecraft!
I've had them in my stash for ages!
The images I have used are Cole Miner & Coal Cart
Both of course from the fabulous Bonibleaux Designs, 
Is he not the cutest little miner you've ever seen!
He's dirty, so dirty, covered in coal dust, but he's oh soo cute!


I coloured the images with Promarkers then fussy cut round them.
I deliberately tried to keep Cole muted & dusty looking, 
just like he was down a mine shaft!
There was a large mining community where I grew up, 
so I was well  used to seeing lots of these pale dusty looking chaps around.

(I didn't plan on the dirty face & I'm not even sure how it happened but 
it sure adds a certain something! lol Actually, every time I look at him he seems to be dirtier)


 The Sentiments were both done in my graphics programme on the pc.
The triangle one was originally going to be just that but then I thought 
it would look better fussy cut too!
The font I have used is Charcoal First & you can download it free here.
I added a shadow to it to make it look like there was poor light!


I cut the circle sentiment out using a nestie & matted it onto 
a circle of black card!


I had to include a little canary for Cole to make sure he was 
safe from any pockets of gas! 
I used some bakers twine to "hang" the cage up
& I added some card candy!


You can just see the little panel I added inside for a message.
I added another to the back of the card too!
I hope you like him! I had a lot of fun with this one!
I hope you an find the time to enter the sketch challenge!

Now I must also remind you that the Halloween Images over at 
are all on 50% sale at present (excluding new releases)
& some of them will be retiring soon to make room for the  new citizens of Dudeville!
Make sure you pop over & check them out before you miss out!

Okay, so, this card was made with a few challenges in mind!
I'd therefore like to enter it into the following:
I Love Promarkers Metal Embellishment/Charm
Your Next Stamp Challenge  Inspired by a song (Working In A Coal Mine-Lee Dorsey)
Creative Card Crew Anything Goes
Creative Craft Challenges Just Charming (my canary in the cage)
Papertake Weekly Anything Goes, Use A Shaped Card
Top Tip Tuesday Easel Card
Cards For Men G is for (grubby)
Crafty Boots Anything Goes
Creative Stamp Friends Card For a Man
Make It Monday Anything Goes
Woodware USA Anything Goes
Corrosive Challenges Funny Or Punny
Sentimental Sundays Thinking of You
Sweet Stampin' Anything but a Birthday

Tuesday 6 September 2011

Scavenger Crawl Candy Winner

Evening all!

If you remember, a couple of weeks back,
I was offering a personal candy giveaway for one lucky commenter on the card I made for the


Dude Time Doodles Scavenger Crawl. 
The crawl is now finished, you won't win a prize but you can still hop round if you want to see it!

I had an awesome total of  53 comments! 
Thank you all for taking the time, I really appreciate that!

Drum roll please while I pick the lucky number from the hat............

And the winners is............

Number 31 That's You! 

Debbie L
Sorry I can't give you all a prize but I'll have another candy soon I promise!


Sunday 4 September 2011

First Birthday Fun

Happy Sunday all! 
Another week has passed us by & we're well on the way to winter!
According to the Met office here in the UK it's officially Autumn! 
eek What happened to summer???
Sorry my post is a bit later today but I forgot to publish before I popped out to a
demo by Nikki at our local garden centre! Thanks Nikki! I always come away with something!
Or should I say I always learn something!(Ha ha ha usually a bit of both if I'm honest!)
Enough of that, now, on to business!

It's time for a fresh new challenge over at The Crafty Pad
The theme for Challenge #137 is "Use Blue & Brown"
A nice & easy challenge for you this week!
Here's my Card


The image I chose to work with is "Just Ted on Ball" from 
The layout was my own.


As always,I coloured him up with promarkers. 
I matched the colours as closely as I could to my papers.
I cut him out using a nestie & edged it with a promarker too!
The papers I have used are from my stash.


I added two colours of Bakers Twine, blue & brown of course,
which I twisted at the front of my panels.
I also made little bunting out of little scraps of paper, which I attached to 
more of the twine & adhered using pinflair glue


I printed a sentiment out I cut it out with a smaller nestie 
& again edged with a promarker
Sorry, I meant to make a mental note of the font I used but 
as I have a brain like a hen, I can't remember!


I added a little flower charm embellishment just because I could!
I hope you like my card! 
Pop on over to The Crafty Pad Challenge Blog & see the other 
DT ladies awesome work & leave them some love if you have the time!
I hope you can find the time to enter the challenge too!
Our Sponsor this week is the wonderful


They are offering an exclusive bundle of ribbons
to one lucky winner!

This card was made with the following challenges in mind:
Birthday Sundaes Birthday Card
Catch The Bug Anything Goes
Crafty Calendar Let Sleeping Bears Lie
Send A Smile For Kids Birthday Fun
Card Makin' Mama's Go Digital
Delicious Doodles New & Fresh (My Twine)
Jellypark Challenges Die Cuts/Punches
Poodles Parlour Animal Antics
Crafty Purple Frog Birthday Cards or Gifts
Do You Stack Up Friendly Critters
Crafts & Me Add a Charm
I Love Promarkers Anything Goes
The Paper Shelter Anything Goes
The Paper Variety  Birthday & Banner